
FIRST Robotics Blog
Wiring Complete
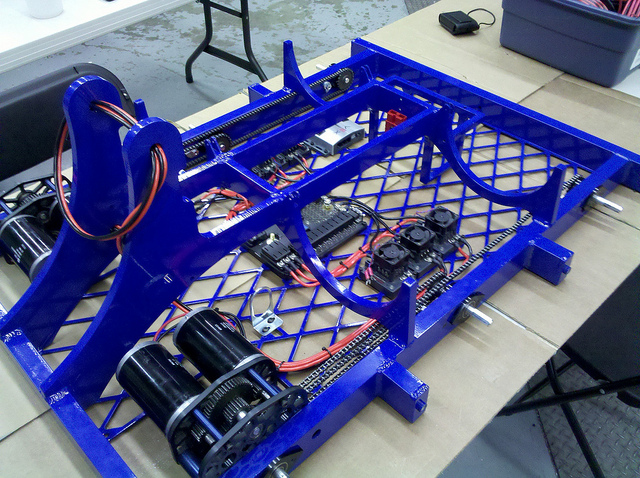
Today, we completed the wiring on the T-Shirt cannon. The large gauge wire and the signal wire was run successfully.
Furthermore, we tested the valve,shooting T-shirts and small balls on a test bed outside the lab to test the range of the robot.
Powder Coated and Wiring Started
The robot returned from the powder coat shop today. The scuba tank also returned from hydrostatic certification after passing its tests. We hooked it up to a test bed and successfully tested the valve.
The machining on the valve block has begun and is coming along great. The block will be finished on Sunday.
Wiring on the robot began today. All of the electronics were mounted on the drivebase and many of the power wires were run. The large gauge power wires and the signal wires still need to be run.
Frame Welded
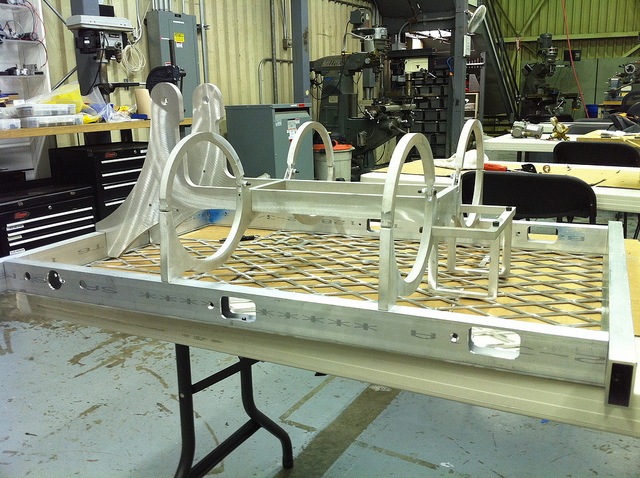
The T-Shirt Cannon’s frame has returned from welding. The frame was prepped for powder coating today and will be brought to the powder coat shop tomorrow.
The high-pressure scuba tank will be brought to Ace Fire Equipment & Services in East Palo Alto tomorrow to get its hydrostatic certification renewed so that it can be safely filled with high-pressure air.
Frame Ready for Welding
After several days of hard work, the frame of the T-Shirt Cannon is ready to be welded. The framerails have been machined and riveted onto the baseplate. The superstructure frame has been pinned to the drivebase. Finally, the mounting blocks for the sideshields have been cut and a welding jig to hold them in place has been made.
The revolver plates have been machined and the tubes inserted between the plates. Once standoffs to go between the plates are machined, the assembly will be ready to weld.
We will hopefully get welding done early next week.
Frame Assembly
Today, we received our parts from BAE Systems, one of our sponsors who generously provided machining for this project. After bringing the parts to the lab, we started assembly. Furthermore, we cut the stock for the round barrels and began to assemble the revolver assembly, which will be welded next week.
Metal Arrives
The metal arrived at school today and we delivered the aluminum plate to BAE Systems, one of our sponsors. BAE has generously offered to provide waterjet cutting for our project. The parts are expected to get cut on Monday.
Meanwhile, at the lab, machining has started on the chassis rails. They are expected to be complete by next Thursday.
Ordering Material
Today, we compiled the master list of the material that we need to purchase for the robot. We already have some of the metal at the lab but most needs to be purchased.
After the list was completed, we ordered material which is expected to arrive on Friday.
Final Design
Today, we were able to bring all of the parts of the design together into one completed robot design.
We will be taking a short break from the build of the robot as school starts up again and will resume again during the first week of September.
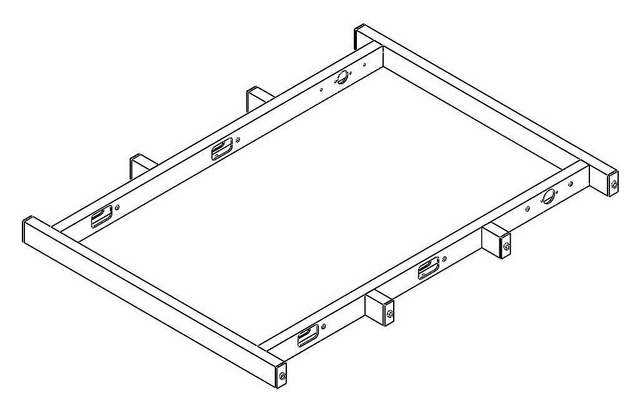
Superstructure Design
Today, we went through and designed the superstructure frame that would hold the robot together. We started by looking at our objectives for the superstructure:
- The superstructure needs to support the revolver and the valve block.
- The superstructure needs to support the SCUBA tanks.
- The superstructure should hold the battery.
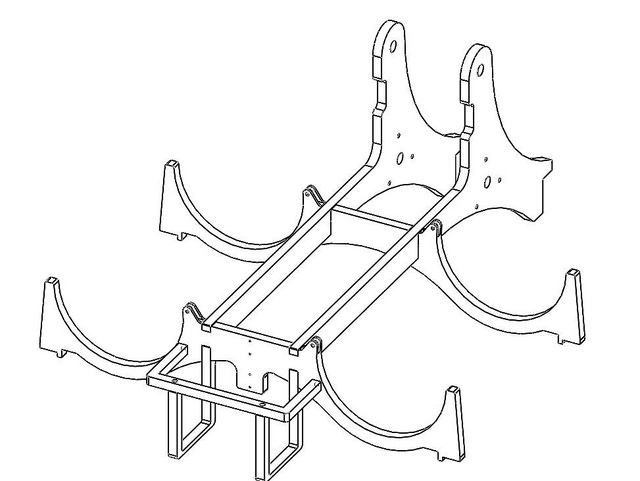
We took our design objectives and decided that building a frame out of 1/2″ aluminum plate would allow us to build a very strong and light frame. We designed several interlocking 1/2″ aluminum plates which will be welded to form the superstructure chassis. The frame will contain cradles to contain the SCUBA tanks as well as bars that will close down on top of the tanks to lock them in place.
Electronics Board Layout
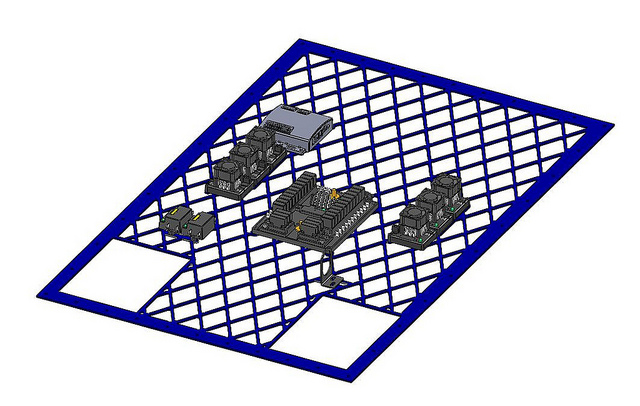
Today, we focused on the design of the electronics board, trying to get the board finalized. We spent some time physically laying out the electronics, trying to find the best configuration to optimize our wire paths. Also, we worked extensively on the design of the baseplate to which the electronics mount, finishing its design.
All of the electronics for this robot are made by VEX Robotics, taken from both the VEX Design System and the VEXPro line.
 >
>
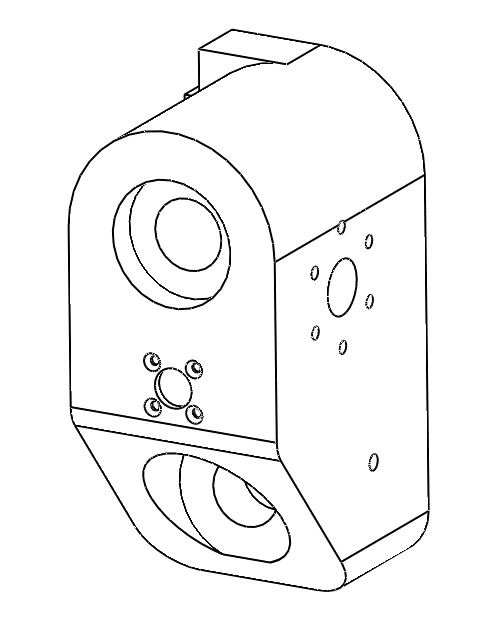
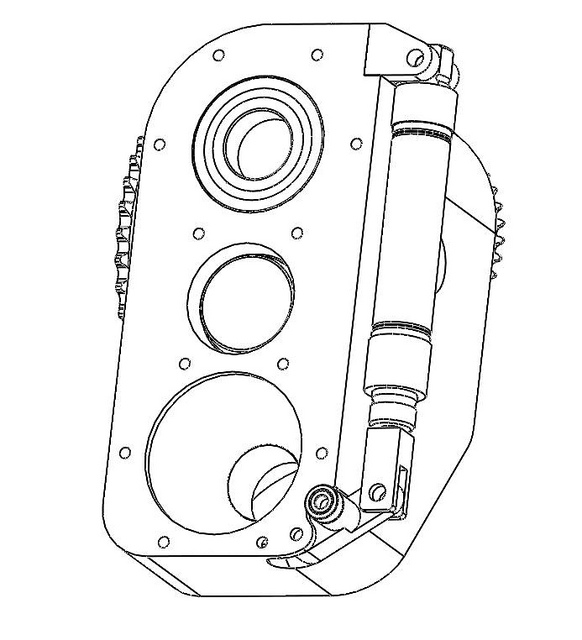
Valve Block Design
The design for the T-Shirt Cannon is coming along great. Today, one group of students started working on a preliminary version of the baseplate that will be used to mount the robot’s electronics.
Another group of students continued to work on the robot’s superstructure, starting to design a block that will serve as the mounting point for the revolver as well as the interface between the air hose and the revolver. Part of this endeavor was to design an indexing mechanism. The mechanism envisioned will have a lever with a bearing on the end that will roll into a slot on the revolver to lock it in place.
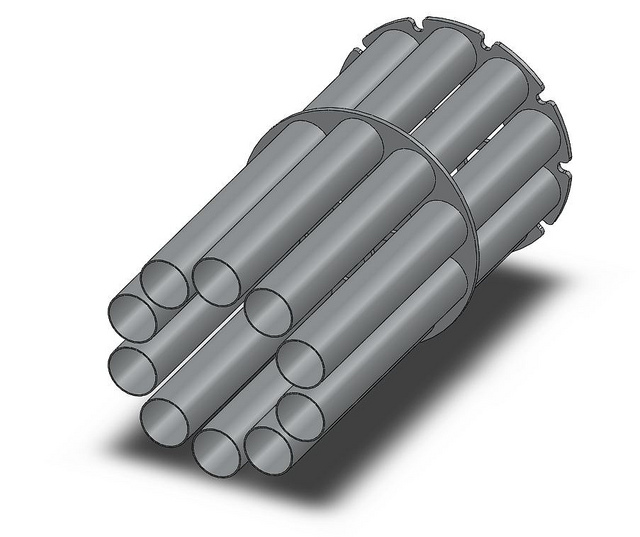
Chassis & Revolver Design
The design for the drivebase is coming along great. The frame members are mostly modeled and we have started to create the baseplate to which the electronics will mount.
Today, a separate team broke away from the drivetrain team and started to model the superstructure. We started with the revolver, modeling a ten-barreled revolver with ten aluminum tube barrels connected with two aluminum plates. The assembly will be welded.
Design
Today, we continued to work on the conceptual design of the robot. Some ideas we had:
- It is necessary for the robot to be relatively narrow (<30″) so that it can fit through a standard doorway. We do not have any real restrictions on the length and height of the robot, but to keep it relatively manageable, we intend to keep it under 42″ long.
- If we moved the drive gearboxes from the center wheels to the back wheels, we could potentially move the scuba tanks lower to the ground and make the whole robot more compact.
Research & Conceptual Design
Today, we started to wrap up the research phase of our project. Some stuff we have learned:
- We found a valve that seems to meet our needs and is in our price range. We plan to move forward with the purchase of this valve. The valve is manufactured by MAC Valves.
- Finding a regulator to regulate the 3000psi air from the scuba tank to working pressure could be expensive.
- We decided that indexing the barrels to line up with the hose will be difficult. We are not sure if a seal will be needed at this connection and we think that it will be important that the revolver is locked in place before the robot shoots. To accomplish this, we will need some sort of indexing mechanism. It seems that indexing will be easier with the revolver than with the linear magazine, so we will start looking more seriously at the revolver.
- We could manufacture a block to interface between the hose (coming from the scuba tank) and the barrels.
- If we place the two SCUBA tanks flat directly above the drivebase, we will be able to keep the robot compact and low to the ground.
Research Progress
Today, we discussed some of the results of our research and started to talk about general design. Some of the things we have learned through our research are as follows:
- To shoot multiple T-Shirts, the best solution seems to be having multiple barrels rather than trying to build a mechanism to reload a single barrel.
- High speed solenoid valves are expensive and it will be difficult to find one that will fit our requirements while staying in our price range.
- Every robot we’ve seen that launches T-Shirts from multiple barrels has one valve on each barrel. We’d like to try to avoid this to cut down on cost.
- Many T-Shirt shooting robots we’ve seen in the past have used PVC piping and/or PVC sprinkler valves. PVC is not rated for pressurized gas and is extremely dangerous when used for gas storage.
- SCUBA tanks seem to be a relatively easy method of air storage. They can safely hold extremely high pressure air and can be filled inexpensively at many SCUBA stores.
- If we can re-use some of the drivetrain parts from past robots, we can save money and reduce the cost of the project.
- The two choices for barrel design seem to be either a rotating revolver or a linear magazine.
- If the robot has large wheels, it may be easier to traverse large obstacles.
Design Objectives & Research Tasks
Today, we met to determine our design objectives for the robot.
- The robot should be mobile, able to drive around obstacles and aim.
- The robot should be able to shoot different distances.
- The robot should be able to make many shots without reloading.
- The robot should be able to hold multiple T-Shirts and shoot several rapidly.
- The robot should be visually appealing so that it can represent our team and our sponsors positively.
- The robot should be able to be transported easily to a number of events.
- The robot should be safe to operate.
After we decided on objectives, we moved forward to discuss items that would need to be researched before we could move into the design phase of the project.
- We need to research Solenoid Valves, ideally with quick response times and high flow rates.
- We need to research the cost of manufacturing a metal chassis.
- We need to research some of the problems and failures faced by previous T-Shirt cannons.
- We need to research some of the safety precautions and regulations necessary for building a T-Shirt launching robot.
- We need to research methods of preparing T-Shirts for launch.
- We need to research methods of air storage.
- We need to research and brainstorm possible general robot designs.
Initial Project Concept and Goals
After deciding that our team wanted to undertake a summer project to build a promotional robot, we came up with a multitude of suggestions for what to build. After careful consideration, we decided that a high-powered T-Shirt launcher would be the best robot for promoting our team, Bellarmine and our sponsors.
In addition to serving as a promotional robot, this project will help to train new team members on robot building skills and techniques so that we can be more prepared for the robot build season during the school year.
The build process will be beginning near the end of the month and we will work through August, possibly going into the first month of the school year.
SVR
We won. Woo!
We brought home the entire super structure/arm as part of our withholding allowance. We will be working on the kicker and tying to make it more consistent. There were some issues at SVR where a “Middle” distance kick would just kind of putt the ball forward. You can see that happen in this video at 1:50ish.
We will also be working on refining the arm, and making it hang faster. Yay for continuous improvement.
Possible causes for kicker inconsistencies:
1. Balls being grabbed too hard – When ramming balls into the wall, it is possible that the ball is being grapsed so hard that the kicker has trouble ejecting it from its grasp. After initial auton testing on Thursday, the code was changed to remove the slight roller pause during kicking, which likely was previously releasing the tight grasp on the ball, giving a more repeatable kick. When testing on the practice field, we were gingerly placing the ball into the roller before kicking. This differed greatly from on field interaction, as more often than not the ball was rammed into the wall or bump, forcing it further into the roller and causing it to grab very hard.
2. Who knows? I will put money on cause #1 – TC
More Autonomous Development
Here is the idea for SVR auto modes:
1) Far Zone – Shoot 3 Balls – Long Kicks
2) Far Zone – Shoot 3 Balls – Bounce kicks in middle zone (more accurate shots, but more chance of ball hitting partner)
3) Middle Zone – Shoot 2 Balls – Start touching tower and go in at angle
4) Close Zone – Shoot 1 Ball – Start touching tower and go in at angle
Number 2 is working as of tonight. It can consistently hit 2/3 shots, but with a bigger field I imagine this will be better.
Bumpers, and practice/development
Today the bumpers for team 254 were completed and are currently en-route. The embroidery looks great. The bumper tubes may need to be milled slightly in width, to account for thicker-than-expected fabric. This would allow the attachment pins to insert into the robot further, if they do not quite reach. A couple members from team 968 will be spending the weekend at the 254 lab, to install revised components, practice driving, and develop code.
